Choose a starting shape, make it yours, and keep the files you need. When you have a physical build, use its measured weight and balance to explore flight predictions.
Open a BT-20 Scout, BT-50 Vector or BT-60 Horizon starter. Each is an editable, untested example. Opening a starter replaces your current choices; Undo starter brings them back.
Work through Body, Nose, Fins and Colors. Choose a printed body or supply your own standard tube. Drag the preview to rotate it, or use Side and Explode parts to inspect the assembly. Colors describe your intended finish; they are not a promise of printer output.
Check actual tube measurements and print a small fit sample before committing to the full build. Nominal sizes and on-screen fit cannot account for every printer or material.
02 / Keep your work
Download your selected design.
Choose Download design package to save the parts for this rocket, the assembled color reference, your editable design and a build checklist. The reference is for viewing the assembly; use the separate printable parts in your slicer.
With a standard tube, supply the tube yourself. Motor retention, recovery components, attachment hardware and other flight equipment require separate planning. Review the package’s checklist before buying or printing anything.
Save design keeps a small editable JSON file. Use Load design to return to it later. A shared design link also reopens your choices; anyone with that link can view them.
03 / Replace guesses with measurements
Weigh it. Find its balance point.
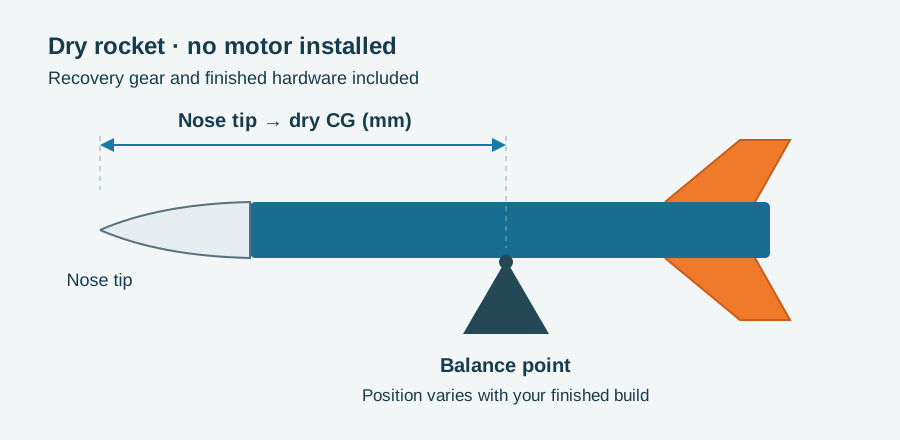
In the Flight tab, enter the finished rocket’s dry mass in grams and dry center of gravity in millimeters from the nose tip. These are for the complete assembled rocket, including finish, recovery equipment, attachments and motor retention, without a motor.
Measure from the nose tip—not from the shoulder or the tail. Illustration only; the marked point is not a target balance location.
Assemble the complete rocket in its flight configuration, with recovery gear packed and no motor installed.
Weigh it on a scale. Enter the result in grams.
Support it gently on a narrow, rounded edge and move the support until the rocket balances horizontally. Protect delicate parts.
Measure the axial distance from the nose tip to that support in millimeters. Enter this as dry CG.
If you have not built it yet, you can use estimates to explore possibilities. Leave the input marked as an estimate, and replace both values with measurements before making a flight decision. Repeat measurements after changes.
04 / Explore the flight
Compare predictions, then review the design.
Use the Flight tab to set your motor mount’s actual inside diameter and usable length, choose compatible motors and enter launch conditions. Select Compare motors to run the hosted OpenRocket comparison.
Review the warnings alongside predicted altitude, launch-guide exit speed, stability and deployment timing. A motor fitting the mount does not establish that it is suitable for the rocket. The modeled loaded balance includes the selected motor; do not add its weight to your dry measurements.
Hosted simulation currently supports the builder’s parametric conical, ogive and elliptical noses. Library nose shapes need further modeling in desktop OpenRocket. Download the OpenRocket file for a closer review of components, recovery and flight conditions.
05 / Let us help
Prefer us to print the parts?
Choose Have ITERA print this in the builder. Your design, dimensions and color plan will be attached to the request form. Check the summary, add the quantity and your contact details, then select Send request.
Opening the form does not submit it or place an order. We will review the design, discuss fit and materials, and confirm pricing and lead time before you commit. A print quote does not certify a design for flight.